tisdag 29 november 2011

Tutorial: Adele inspired look

Hi cutie pies! 
Today I'm going show you how to do my version of the makeup that Adele wears on the December 2011 issue of Cosmopolitan.  This is really a super easy look to achieve and still it looks great! Hope you like it :)

Step 1
Start by applying a primer and then an eyeshadow about the same color as your skintone all over your lid, all the way up to your brows. 


Step 2.
With a blending brush add some matte bronzer or teracotta colored eyeshadow to your crease. Blend out well with circular motions. Fill in your brows with a brow pencil or an eyeshadow similar to your natural brow color. On the picture Adele's brows looks absolutely fabulous. Mine are a bit wild and crazy right now to I also ran them through with some clear brow gel on a clean mascara wand. If you don't have any brow gel you can use hairspray on a clean mascara wand instead. 


Step 3.
For the eyeliner I chose MAC fluidline in "Blacktrack" but you can use a liquid eyeliner as well. Draw the line quite thick. Make sure that you get the liner between your lashes as well. 


Step 4. 
Add mascara and a pair of long but still natural false eyelashes. The ones I'm using here are from H&M. Their maybe not great eyelashes but they were cheap and not too bad. ;)


Step 5.
It doesn't look like Adele has anything under her lower lash line so I went over my waterline with a off white eyepencil and put a teeny tiny bit of mascara on the lower lashes. After putting on the mascara I ran through the lashes with a clean mascara wand. 


Step 6. 
Put on your foundation, concealer and powder (if you need it). If you have oily skin you can powder your T-zone, but if your skin is dry you probably won't need any powder at all, especially not now during the winter when your skin is even dryer than normal. 

Put the same bronzer you used as eyeshadow on your cheeks to mark out your cheekbones. 

Step 7. 
On the picture Adele's lips look quite nude so I put on Clinique Long Last lipstick in "Creamy Nude" and on top of that Clarins Instant Light Natural Lip Perfector. 

Here's the finished look! 


måndag 28 november 2011

Green Monday Night time look

So, here's the night time version of the look that I posted earlier today! :) I added some black eyeliner to the waterline and upper lash line, black eyeshadow in the crease and under the lower lash line and a pair of false eyelashes. As you can see I also updated the lip look. 


Products used to update the look:

Eyes
*Make Up Store Microshadow "Pollution"
*Isadora Inliner "Indian black"
*H&M false eyelashes Long black


Tip! If you are going out after work and are planning on wearing the same makeup as during the day, remember not to put any powder on so that you can reapply your foundation later! Your foundation will most certainly need to be reapplied after a long day at work and if you have powdered your face reapplication of foundation or more powdering will create a cakeyness that is anything but cute! 

Green Monday

Hello!
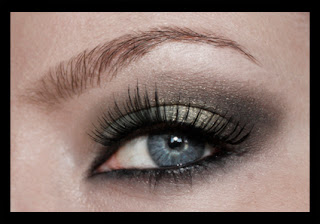
The look of today is a wearable sort of smokey eye with a shimmery light green lid. This look is also easy to update to a more dramatic smokey eye suitable for a night out by simply adding some black eyeshadow in the crease and under the lower lash line. For a more dramatic look you can also add some false eyelashes and a brighter color to the lips. 


Face
*Clarins Everlasting foundation "Ivory"
*YSL Touche Éclat 01
*e.l.f. Custom Face Blush "Shy"

Eyebrows
*Coastal Scents 88-palette

Eyes
*e.l.f. Eyelid primer "Sheer"
*NYX Jumbo Pencil "Milk" (base and lower lashline)
*Make Up Store Eyedust "Bamboo"
*Coastal Scents 88-palette
*Isadora Inliner "Indian Black"
*Clinique High Impact Mascara

Lips
*Make Up Store lip pencil "Somethin Blue"
*Clarins Instant Light Natural Lip Perfector


1. Crease and eyebrows
2. Outer V, drag slightly into the crease
3. Highlight under brows, inner corner


söndag 27 november 2011

Black and gold eyeliner

Hi sweetie pies! 
Today I did this variation of the usual pinup/retro eyeliner makeup that I usually wear for work. Since I don't own an actual golden liquid eyeliner I made one myself using eyeshadow from the 120-palette and Mixing Liquid from Make Up Store. Hope you like it! :)


Face
*Clarins Everlasting Foundation "Ivory"
*YSL Touche Éclat 01 

Lips
*Lipbalm
*Lipstick from Oriflame (don't no the name of it since it's an unmarked sample)

Eyes
*e.l.f. Eyelid primer "Sheer"
*120-palette
*88-palette
*Make Up Store Mixing liquid
*Isadora Waterproof Glossy Eyeliner
*Clinique High Impact mascara
*H&M Long Black eyelashes


lördag 26 november 2011

Bronze and teal

Hello everybody!

I've been kind of busy the past days but here's a look that I made a couple of days ago :) I decided to call it "Bronze and teal" because of the bronze eyepencil from e.l.f. but after adding eyeshadow over the eyepencil it really turned out more copper than bronze. Anyway, hope you like it and let me know if you would like to see a tutorial for it! :)


Eyes
*Make Up Store Cybershadow "Buzzer" 
*Make Up Store Microshadow "Pollution"
*e.l.f. Shimmer Eyeliner pencil "Boldly bronzed"
*120 palette 
*MAC Fluidline "Blacktrack"
*Clinique High Impact mascara


onsdag 23 november 2011

e.l.f. haul!

Yesterday I received a package from e.l.f. containing some quite boring but necessary stuff that I had ordered plus a free Mystery box.


This is what I got:

*12 mascara wands
*Clear eyebrow gel
*Eyelid primer (Sheer)
*Daily brush cleaner (which I really recommend)

The mystery box contained:

*Shimmer eyeliner pencil in "Boldly Bronzed"
*Nail polish "Twinkle"
*Nail polish "Golden Goddess"
*Bamboo Powder Brush

So let's start with the clear eyebrow gel. I've bought it before but if you use it on your brows after having filled them in the brush and hence the product will get dirty, which looks really gross after only a couple of times using it. So I highly recommend you to clean your mascara wand before putting it back into the brow gel! An alternative is to use the disposable mascara wands which you can buy really cheap from e.l.f. :)

The Daily Brush Cleaner is actually great, although it has quite a funny smell. It lasts long too, I've used mine at least once a day (for all my brushes) and it has lasted for about two months. It takes at least a couple of minutes for the brushes to dry though.

I've wanted to try the Shimmer Eye pencils for a long time now but I've hesitated since cheap eye pencils tend to be quite dry and hard to work with. I must say this product was a positive surprise since it is soft and easy to blend. Actually I liked it a lot and will probably be buying more of them in the future. :)

The nail polishes are both glittery and very beautiful and can be used alone or atop of a dark polish. "Twinkle" looks great on top of a black polish!
What I don't like about both of these nail polishes is that they leave a rough surface on the nail (all glitter nail polishes I've tried does so it's nothing unusual).

I haven't tried out the powder brush yet but it seems like a brush of good quality. It's very, very soft and this far it hasn't shed at all.  I can't say that mush more about it before I've tried it but if it turns out to be a great disaster I'll let you know. ;)

Les fleurs du mal

Hello!
I've finally got the Duo lash glue so now I'm able to use rhinestones and stuff like that again. A couple of days ago I came up with this look with red and orange eyeshadows, some swirls and flower-shaped rhinestones. My camera didn't pick up the gradation (or whatever it's called) on the eyeshadows that well though. It's supposed to be 3 different shades of orangey red but it looks like two.


I realize that for most people this is way too much makeup to wear even on a night out so I thought you might like an alternative without the swirls and flowers: 


Sorry for the crappy picture! I did this makeup in the evening and by the time I was finished with the second eye the sun had already set = really bad light conditions for taking pictures. 
Hope you like it anyway! :)

Face 
*Clinique Pore Minimizer Instant Perfector
*Clarins Everlasting Foundation "Ivory"
*e.l.f. Tone correcting concealer "Ivory"

Eyes
*UDPP
*120-palette


1 = inner corner
2 = middle of the eyelid
3 = outer corner and crease

*Use a eyeshadow in your skintone as a highligher under your brow
*M.A.C. fluidline "Blacktrack"
*Clinique High Impact Mascara
*Flower shaped rhinestones from a craftstore
*Duo lash glue

Lips
*Lipbalm 


måndag 21 november 2011

Tutorial: Wearable gold


So, today I'm going to show you how to create the look on the picture below. It's a wearable look with brown and cold, which particularly flatters blue eyes but can be worn by people with any eye color. Hope you like it! :) 


Step 1. 
Start with a primer all over your lid and underneath your lower lash line as well. I've used e.l.f. eyelid primer. Paint your eyelid with a brown eye pencil, preferably khol. The one I've used is not khol so it is more difficult to blend. Therefore, I waited a moment before blending so that the warmth of my skin could make the product a little bit softer. 


Step 2. 
Blend out the eye pencil with a stiff blending brush, making sure there are no harsh lines. Take a shimmering warm brown color and apply in the crease, concentrating the color in the outer corner. (You can see what colors I've used in the picture in the end of this tutorial). Blend out the color softly using windshield wiper motions. 


Step 3. 
Press a very shimmering cold eyeshadow all over your eyelid (but not in the crease). 


Step 4. 
Apply a really dark brown in the outer corner of the eye, dragging the color into the crease. This step requires a lot of blending so be sure to have a good blending brush at hand ;) The eyeshadow I used is the darkest brown from the Coastal Scents 88-palette. 


Step 5. 
To create even more depth, take a black eyeshadow and apply the same way as you did with the dark brown in the previous step. Using a smaller brush, apply the black carefully under your lower lash line as well. To brighten up the eye a bit apply NYX jumbo pencil "Milk" in the inner corner of your eye. 


Step 6. 
Blend out the NYX pencil and apply some shimmery white eyeshadow over it. Line your waterline and upper lash line with a black eye pencil. Apply your foundation and powder before applying mascara. 


Step 7.
For blush I used Make Up Store Wonder Blush "Cleopatra". I filled in my lips with Revlon ColorStay lipliner in "Plum" and put Clinique Superbalm Moisturizing Gloss in "Raspberry". 

I filled in my eyebrows with the color marked "7" on the picture of the 88-palette, which is quite similar to my natural brow color. 

So here's the shadows form the 120-palette that I used in this tutorial: 


88-palette


söndag 20 november 2011

Look of the day

I'm obsessed with this color combination right now! 


Face 
*Clinique Pore Minimizer Instant Perfector "Invisible Light"
*Clarins Everlasting Foundation "Ivory"
*YSL Touche Éclat No 1

Eyes 
*e.l.f. eyelid primer 
*120 palette (see picture below)
*M.A.C. Fluidline "Blacktrack"
*Isadora Inliner "Indian Black"
*Clinique High Impact Mascara "Black"


False eyelashes
*H&M Long Black


Tutorial: Blue and yellow cateye

Step 1. 
Prime your eye with your primer of choice. Currently I'm very fond of the e.l.f. eyelid primer. With a soft, black eyepencil a V-like shape in outer corner of your eye, slightly above the crease.


Step 2. 
Using a small, angled brush smudge out the "inside" of the shape, downwards towards your lid. You don't want the outline of the shape to be very sharp so carefully go over it with the same brush. 


Step 3. 
Use some of NYX jumbo pencil in "Milk" over your lid and blend it out with your finger (or a brush). Be careful when blending the white into the black. 


Step 4.
Almost all the eyeshadows in this tutorial are from the 120-palette so in the end of this post I will show you which ones I've been using in each step (with the step number printed on the eyeshadow used in that particular step). 

Take one of the matte yellow eyeshadows from the 120-palette (or from some other brand if you prefer :)) and press it on about half of your eyelid, leaving a little empty space on the area closest to your inner tear duct. Blend it out a bit above your crease and into the white base. 


Step 5. 
Take a light blue eyeshadow and apply outside the yellow. Blend it into the yellow and up into the black. Here I would preferably have used a matte, light blue eyeshadow but since I didn't find one that I liked I went for a slightly shimmering one instead. 


Step 6. 
Press a matte, dark blue eyeshadow to the part of the eyelid that is left, closest to the cat eye shape that we drew with our eyeliner pencil. The one I've used looks quite purple but turns out blue when applied on the skin. Blend it well up into the cat eye shape.


Step 7. 
Take a black eyeshadow and go over the cat eye shape, blending it into the dark blue. This is just to make the shape darker and more defined. Also, drag down the black along your lower lash line.

Last but not least, add some matte white to the inner corner of your eye (I've marked the white I used with 8 on the picture).


Step 8. 
Line your waterline and upper lash line with a soft, black eye pencil. Smudge it out a little.


Step 9. 
Add some black mascara (I've used Clinique High impact mascara) and fill in your brows with a brow pencil or some eyeshadow. 

The finished result should look something like this! 
I hope this tutorial has been helpful for you. Thank you for reading! :)


Note! I almost always apply my foundation, concealer and powder after the eyeshadow, especially when working with darker shades. This is to make it easier to clean up any fallout. 


The 120-palette with the eyeshadows I've used in this tutorial marked out:


lördag 19 november 2011

Twilight special: Alice Cullen makeup

Today I saw the new Twilight movie "Breaking dawn - part 1", which was absolutely amazing! Of course I had to do a makeup look inspired by my favorite character Alice :) This one is actually inspired by the makeup Alice is wearing at the party in "Eclipse", but I wanted to add something more so I imagined what Alice would look like in sunlight and applied some glitter at the spots where the sun hits her face. Hope you can see the glitter! ;)

onsdag 16 november 2011

Tip of the day!

Today I probably won't have time to do a full on tutorial so I thought I'd share some information with you guys instead.

I recently bought some books from the super famous makeup artist Rae Morris and there's particularly one tip in there that is worth its weight in gold (the question is how much a tip weigh but you get my point ;) ).

Once you've applied powder to your face you can't do any touchups with cream or liquid products (such as foundation) later. So, if you know you're going to need to reapply foundation during the day, skip the powder! 


I actually tried it and found this to be a crucial truth. Adding more liquid or cream product to an already powdered face will give an unclean and cakey appearance which you don't want unless you're going for the "my-face-is-falling-off"-look.

As for the Rae Morris books I will give you a review of them as soon as I've finished reading them both!

Tutorial: Black and blue smokey eye with some special effects

Step 1.
First I primed my eyes with Urban Decay Primer Potion (hereafter referred to as UDPP). The primer goes on everywhere we're going to put eyeshadow!


Step 2. 
Put NYX Jumbo Pencil in "Milk" in the middle of your eyelid. Smudge it out a little by gently patting it with your finger. You could use a brush but the heat of your fingers will warm the product up and thus make it easier to blend. 


Step 3. 
Take a bright blue eyeshadow on a flat shader brush and press it on top of the NYX pencil. I used one of the blues from the 120 palette and the Sigma E55 brush. Blend the blue eyeshadow out, using either the shader brush (which you have wiped off) or a clean blending brush. I used the M.A.C. 217 blending brush.


Step 4. 
Take a matte black eyeshadow (I used the one from the 120 palette) and add it to the inner and outer corners of your eyes. Blend it up into the crease using preferably another blending brush than the one in step 3, since we're going to reuse that one later. Be careful to blend the black well, since we don't want any harsh lines!

Step 5. 
If you need to increase the intensity of the blue in the middle of your eyelid, just take the same blending brush (or shader brush) that you used in step 3 and add some more blue with that, blending the blue outwards into the black. You can also intensify the black if you want to add more depth!
Line your waterline with a soft black eyeliner pencil.

Tip! To make the eyepencil on the waterline last longer, dip it in a black eyeliner before application! 


Line both your lower and upper lash line with a black eyeliner, and smudge it out with either your finger or a small brush.


Step 6. 
I've added some glitter gel (Makeup Store "Alva", which I am all crazy about at the moment) to the blue eyeshadow and then filled in my brows with a brown eyeshadow similar to my natural brow color. You can just stop here, add some mascara and admire your good work, but I decided to take it a step further! 


Step 7.
Using a really thin brush and black gel liner paint some spidery decoration under your eyes, starting from your lower lashline and draw outwards and downwards. As you can see I've also added a little dot under each of the lines :) Done!

Keep in mind! If you hadn't applied your foundation and concealers before starting your eyemakeup be sure to do that before adding the "decorations". Otherwise the fine lines and dots you draw might be smudged!