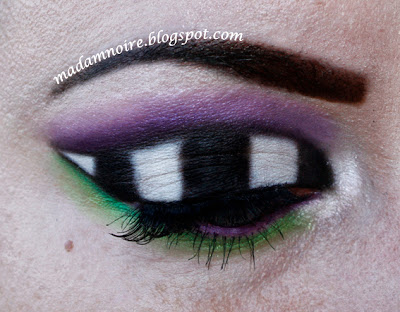
Links to the other girls Penguin makeup looks:
Confusionbay
ComaHeart
Stargirlphoto
They've all made wonderful contributions to this challenge so go check them out! :)
I apologize for the strange colors on the tutorial pictures. It was not until I had finished the whole look I realized that my camera was set on a too high saturation value, which doesn't show on the thumbnails on the camera screen. :( The finished look however has got the correct colors!
Step 1. I've already taken some steps ahead (before I got the idea to make this into a tutorial) and primed my eyes. Then, apply NYX Jumbo Pencil in Milk all over the lid, concentrating the color at the lower parts. After that, draw on the black stripes with a regular eye pencil. Don't worry too much about blending but gently pat the stripes with a finger to make them somewhat even.
Step 2. Fill in the white stripes with a bright orange eyeshadow. I used a mixture of Flamepoint and Buttercupcake by Sugarpill, since Flamepoint alone is too dark for this purpose.
Step 3. Apply the blackest black eyeshadow you own on top of the black stripes and then carefully diffuse the edges between the stripes. You don't want to blend them in too much, just create a softer transition from black to orange and vice versa.
Step 4. Clean up the edge of the eyeshadow with concealer. Then fill in the brow with orange and black eyeshadow, creating a gradient look.
Step 5. With a sharp angled brush (such as MAC #266) draw a "line" underneath the lower lash line. It's hard to explain this in words so just look at the picture and try to do something similar, ok? If you have any problems you're always welcome to ask. :) Also, extend the inner corner stripe into a little point.
Step 6. Line the upper lash line with a black liquid eyeliner. Make the line very, very thin!
Step 7. Above the black liner, place a line of orange.
Step 8. I wanted to give my eyeliner a more cartoonish look so I drew another black line above the orange one. Then I applied mascara and false eyelashes to my top lashes.
Also, whiten the waterline with a white eyeliner pencil.
Step 9. Apply the same orange eyeshadow as we used before on the waterline and finish off the look by painting your lower lashes with the orange liquid eyeliner. When cleaning up the mess I made under my lash line I accidentally applied a little too much black, which honestly looked great with this look, so feel free to take the black further down in step 5.

Face
*Skin Base Foundation 02 (Illamasqua)
*Studio Finish Concealer NC15 (MAC)
Eyebrows
*Flamepoint (Sugarpill)
*Buttercupcake (Sugarpill)
*Corrupt (Makeup Geek)
Eyes
*Jumbo pencil Milk (NYX)
*Medium Pencil Sophie (Illamasqua)
*Flamepoint (Sugarpill)
*Buttercupcake (Sugarpill)
*Corrupt (Makeup Geek)
*Blanc Type (MAC)
*Eye Booster Ultra-black (Physicians Formula)
*Eyeliner 6th element (Lime Crime)
*False eyelashes #41 (Red Cherry)
-------------------------------------------------------------------------------
Now tell me about you Halloween looks! What are you all going to dress up as? :)
Thanks for reading and hope you'll have a lovely day!


